Friday 29 September 2006

A mini Linux PC for less than $100

When recently, Microsoft released the estimated pricing for their yet to be released OS Vista, I had wondered aloud whether it is right to price an OS at par with or even more than the cost of the hardware on which it runs. And rightly so, the cost of hardware is dropping by leaps and bounds.

A Taiwanese hardware manufacturer is shipping a Linux powered PC (code named TU-40) for just (US)$99. The specification of the PC is modest and it runs with 128 MB RAM and has a 200 MHz processor. The company claims this is enough power to run lightweight GNU/Linux distributions.

Fig: Front and backside of the PC

The exact specifications of the PC are as follows :
  • 15-pin D-type female VGA connector
  • 10/100 Ethernet
  • 44-pin EIDE interface header
  • CompactFlash Type I/II slot
  • 2 front and 1 rear totalling 3 USB ports
  • PS/2 keyboard and 6-pin mini-DIN mouse port
  • AMI BIOS
  • Battery-backed RTC (real-time clock)
  • AC-97 V2.1 compliant CODEC
  • MIC-in & line-out phone jacks
  • 0 to 108 deg F (0 to 60 deg C) operating range
Fig: The actual size of the PC

Tuesday 26 September 2006

A concise guide to installing and using FreeDOS ver 1.0 in GNU/Linux

I have always looked at the DOS operating system with some nostalgia. At a time when networking as you see now was confined to some labs or universities in the US, and one had to put up exclusively with floppies to transfer data from one computer to another, DOS was a big player atleast on the home front. I have fond memories of playing games such as pacman, Dig Dug, galaga, ..... on Dos.

I clearly remember the Win 3.1 operating system which was entirely built on top of MS-DOS. But when networking between computers became more common, Dos (or MS-DOS as it was known) started revealing its shortcomings as it is not a network operating system and was designed to be run on standalone machines. More over it did not have true multi-tasking, multi-user functionality. Recognizing these drawbacks, Microsoft decided to move on and built the Windows 95/98/NT/2000/XP OSes and gradually shifted base from a DOS based kernel to an entirely new network operating system as you see in Windows 2000/XP.

FreeDOS is a project which aims to recreate the magic of DOS and bring a truly free GPLed DOS encompassing all the characteristics of MS-DOS with lots of improvements thrown in. A couple of weeks back, FreeDOS developers released ver 1.0 of their OS. I downloaded the full CD ISO of FreeDOS from their website which was around 153 MB in size.

Since I have been using Linux as my operating system, I decided to install and use FreeDOS inside Linux by means of an emulator. In the past, I have used Qemu to run Damn Small Linux on my Ubuntu machine. And I was pleased with its performance. So I decided to use Qemu to run FreeDOS as well.

Qemu is an emulator which can be used to run a variety of OSes inside a host OS. It is well supported on the Linux platform with ports available for Windows and Mac OSX. Since Qemu is not installed by default on my Ubuntu machine, I had to install it first using the following command:
$ sudo apt-get install qemu
Once qemu was installed, I created a directory named freedos in the /opt/ path and moved the downloaded FreeDOS ISO file into it.
$ mkdir /opt/freedos
$ cp fdfullcd.iso /opt/freedos/.
Preparing an image to hold the FreeDOS
In Linux, everything is considered a file. So the hard disk, the monitor, the keyboard, mice are all recognised as files by the OS. By the same logic, it is possible to install programs and entire OSes into a file, the only requirement being the file should be large enough to store what ever is intended to be stored in it.

My intention was to install FreeDOS into a file and boot it using QEMU. I roughly estimated that 400 MB space is ample for installing and working in FreeDOS and so created a raw file named freedosfile.img roughly of size 400 MB using the dd command as follows:
$ cd /opt/freedos
$ dd if=/dev/zero of=freedosfile.img bs=1024 count=400000
400000+0 records in
400000+0 records out
409600000 bytes (410 MB) copied, 18.9476 seconds, 21.6 MB/s
Now a long listing of the directory /opt/freedos gave the following output:
$ ls -l /opt/freedos
-rw-r--r-- 1 ravi ravi 160184320 2006-09-05 02:11 fdfullcd.iso
-rw-r--r-- 1 ravi ravi 409600000 2006-09-12 10:38 freedosfile.img
Installation of FreeDOS
To initiate the installation of FreeDOS, I used the following command:
$ qemu -cdrom fdfullcd.iso -hda freedosfile.img -boot d
In the above command, -cdrom flag points to the ISO image of FreeDOS, -hda option denotes the hard disk to which I passed the name of the just created image (400MB) and finally -boot flag takes different options one of which 'd' denotes to boot from the CD-ROM.


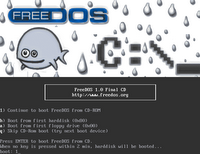
Fig: FreeDOS installation boot screen

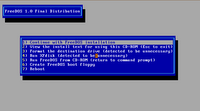
Fig: Another installation screenshot

I was shortly presented with a beautiful splash screen featuring the FreeDOS mascot - 'Fd Fish', and I was provided a menu which among other options prompted me to boot from the CD-ROM. I pressed enter and I was provided a second menu which gave me options to initiate the FreeDOS installation or boot the live CD. At this stage if you are in two minds about installing FreeDOS, you can continue booting from the CD and in a few seconds will be placed in a FreeDOS shell. But since my intention was to install the OS, I chose the first option which is to install to hard disk using freedos setup.

Without going into undue details, let me give a run down of the installation process:

Installation steps for FreeDOS
  • Select your language and keyboard layout.
  • Prepare the hard disk for FreeDOS 1.0 final by running XFDISK. You can also create a floppy boot disk at this juncture.
    Since the hard disk that freedos recognises is actually a file freedosfile.img which I passed via the command line, I chose to create a single primary partition encompassing the whole file (disk). Once the partition was created, pressing F3 wrote the changes and prompted me to restart the computer - which of course is the emulator Qemu. The right thing to do here is to press Yes and the same boot process takes place as earlier and in a short time I was provided with a menu prompt asking to format the hard disk (the file) with fat32 file system.
  • Next the installer prompts to continue with the installation which includes :
    - agreeing to an end user licence (GPL)
    - installing the packages. Here I had the option of providing an alternate path to install, the default path being 'C:\fdos'.
The FreeDOS OS is split into 10 packages each pertaining to a particular aspect of the OS. They are as follows:
  1. base - Essential DOS utilities which reproduce the functionality of MS-DOS
  2. compress - Free file compression and decompression utilities (7zip, arj, bzip2, cabextract, gzip, tar, zoo ...)
  3. driver - Free drivers for network cards and usb
  4. edit - A collection of editors (emacs, vim, pg, setedit, ospedit)
  5. games - A good choice of free DOS games - Doom, Solitare, BumpNJump, nethack, tetris...
  6. gui - Gem Desktop (Very nice)
  7. lang - Free compilers and assemblers (Pascal,C,Basic,assembler,Fortran, debuggers,make tool...)
  8. media - Free multimedia applications (cdrtools, ogg vorbis, mpxplay,lame ...)
  9. net - Networking programs (wget, VNC, SSH client, lynx, arachne, mail client, wattcp - a free TCP/IP stack for DOS).
  10. util - Free file, directory and other utilities (fprot anti virus, locate, head, du, cal, dos32ax, tail, tee, 4dos, uptime ...)
It is prudent to select all the packages to enjoy the full functionality of FreeDOS. Next I was provided a list of programs from each package where I could fine tune my choice of programs. More specifically, FreeDOS ships with two kernels - the stable one called 'sysx' and the unstable kernel named 'unstablx' and I could choose one from the other. The unstable kernel has support for Enhanced Mode Win3.1 and some DOS programs require this to work properly. So I selected the unstable kernel and the copying of files started.

All in all, it took about 15-20 minutes to install all the packages. Then FreeDOS started configuring the parameters. And I was prompted to choose a packet driver. There is a packet driver for Qemu provided which I selected . Following which I was prompted to install the OpenGEM GUI.

Post installation, FreeDOS starts configuring certain aspects and asks a couple of questions such as the address of the mailserver, the email id and a few other parameters.

Starting to use FreeDOS in GNU/Linux

Once installation was over, I booted FreeDOS in GNU/Linux using the following command:
$ qemu -hda freedosfile.img -boot c
... and shortly I was placed into the C:\> prompt. I would like to clarify that the above command will not start FreeDOS with networking enabled. For that, I had to put in some extra efforts and configure a tun-tap device, the steps of which are the topic for a separate article.

And yes, to have access to the floppy drive from within FreeDOS, I used the command as follows:
$ qemu -hda freedosfile.img -fda /dev/fd0 -boot c
What I like most about FreeDOS is the number of additional commands which have been included in it apart from the basic ones that were originally available in DOS. Linux users will be endeared to find tools such as head, tail, cal, ls, tar, gzip, bzip2, lynx, wget and many more ported to FreeDOS. Not only that FreeDOS comes bundled with a utility called 4Dos which adds many additional features to the bland Dos shell such as command line history, command completion and so on. Gem Desktop is a real beauty and will bring some relief to the GUI fanatics among us.

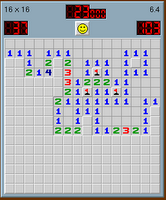
Fig: Mine game in progress

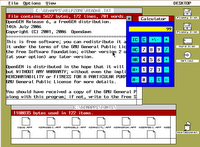
Fig: Open Gem Desktop

While on the topic of applications bundled with FreeDOS, a special mention needs to be made about Arachne web browser. This is (in my knowledge) the one and only web browser developed for DOS which is capable of displaying both text as well as images. It also extends as a desktop and allows one to access the files on the hard disk. It supports most protocols supported by any modern web browser which includes http, ftp, irc, smtp, pop3, finger, gopher, find ....and so on (see the image below).

Fig: Arachne Web Browser

What is the motive for running FreeDOS when you have Linux ?
Now this is a question which most Linux users will ponder when faced with deciding to try out FreeDOS. The number one reason for using FreeDOS in my opinion is the enormous collection of applications available which run on DOS - many of them which were shareware at one point of time, now having been released as freeware. I still find small businesses running point-of-sale billing applications written in Foxpro using a low end 486 machine running MS-DOS. And these machines are prime candidates for running FreeDOS. Then there are the horde of classic games which have no other equivalents found in any other operating systems. These reasons alone should be sufficient to persuade a person in installing and trying out FreeDOS on his machine. And installing and running it using Qemu makes it possible to, figuratively speaking, have the cake and eat it too.

Sunday 24 September 2006

How LAN switches work

A couple of years back, the computers were connected to each other by what is known as a bus network where all the computers were connected using a single coaxial networking cable hooked to each computer using a T connector.

But this kind of arrangement caused a lot of problems and a break in the cable,loose connectors or a cable short was enough to bring down the entire network. And troubleshooting these problems were a big headache because it was difficult to pin-point the error. To circumvent this problem, another network design was embraced which is the star network where the computers are connected to each other via a common physical device called a hub.

Now a days, small ethernet networks consists of a hub. And all packets which are destined to other computers has to travel via the hub. The duty of the hub is simply to recieve packets through one port and broadcast it through all the other ports. So the hub operated under a single collision domain and a single broadcast domain. For small networks consisting of less than 10 machines, the hub is ideal but its performance rapidly degrades when the network is scaled to include more machines.

A switch can be considered to be (in layman speak) an intelligent form of a hub in that there is a software which resides inside the switch which learns and stores the Mac addresses of all the machines connected to it. And once the learning phase is over, a switch is able to route the packets destined for a particular computer within the same network intelligently thus bringing down the broadcast noise and eliminating packet loss due to collisions. So switches are said to operate under the same broadcast domain but different collision domains. Another difference between a hub and a switch is that all the nodes (devices) that connect to a hub share the bandwidth where as a device that connect to a switch port has the full bandwidth alone. Switches usually operate in the layer 2 or data link layer of the OSI reference model where as hubs operate in the layer 1 or physical layer of the OSI model. Using some switches, it is possible to segregate a network into multiple broadcast domains by configuring the switches as VLANs (Virtual LANs).

There is another device called a router which operates in the layer 3 of the OSI reference model which is termed the network layer. This device is used to route packets which are destined for computers residing in remote networks. Routers operate under different collision and broadcast domains.

Cisco is the world leader in the switches and router market though there are other players like Juniper networks and Dlink which also manufacture routers, switches and hubs. Cisco is also famous for its certification exams which qualify a person as a CCNA/CCNP/CCIE which has great value in getting employed in the networking field. I came across this interesting article which explains the inner working of a LAN switch which makes an informative read.

Friday 22 September 2006

Linux developers sign a petition rejecting the current draft of GPLv3

Nothing has created furore more than the GPL version 3 which is still in the draft stage. The Free Software Foundation's move to create a separate version of GPL taking corrective measures to guard against DRM has not been well received by the core group of Linux developers which includes Linus Torvalds.

Linus's line of thought (as far as I have understood) is plainly that DRM is just a technology and it has both positive and negative uses. And it is not for FSF to take an anti-DRM stand purely based on a political aspect.

Where as, the staunch supporters of GNU have put their weight behind GPLv3 and for them it is about safeguarding ones freedom in this changing technological scenario and making sure that GPL holds relevance even in the future. Of course, I have over simplified the whole thing by stating it in such a simple manner.

The Linux kernel developers have signed a petition and cast their vote in favor of Linux retaining the current license ie GPLv2 even after when GPLv3 is finally released. They point out to three provisions in the new GPLv3 draft which is the DRM clause, the additional restrictions clause and the Patents clause for their dissatisfaction. It may be pointed out that GPLv2 has been in force for over 15 years now.

I found the following comment posted at lwn.net really thought worthy, and I quote:
...You can't scare big business away from Linux now. Look at the milestones made in 2.6. Look at the improvement upon system after system 2.6 has made over 2.4. No company in the right mind would desert a GPLv3 2.8 if it made only half the advances as 2.6 has.

I have a sneaky suspicion (and its entirely my own feeling) that money is behind this. Linux isn't GNU/HURD. But everyone wants HURD-esqu freedom. Now we've got a HURD-like (as in free) system, in the form of Linux, we've forgotten the values. Rich with stability.

I just hope no more software hijacks the GNU bandwagon, only to jump off when it becomes profitable.
How true...

Wednesday 20 September 2006

A Timeline of the History of Unix/Linux Revisited

A couple of months back, I started working on a Mind Map of Linux distributions which endeavored to show a birds eye view of all the Linux distributions and its descendents. But only when I started documenting it, did I realize the gravity of the situation. For one, there are umpteen Linux distributions and then a couple dozen more. And many Linux distributions do not have enough documentation which explains from which distribution they evolved. I found some Linux distributions which had drawn some aspects of two mainstream distributions and so on. It seemed anybody and everybody who were interested in Linux were rolling out their own distribution. But I do update the map and perhaps if time permits might complete what I started.

In the mean time, I came across this wonderful timeline of Unix OSes which also includes Linux created and maintained by Eric Levenez which is a real eye opener with respect to the sheer number of Unices out there, though he has also stated that his timeline is not complete by any respects. After all there are over 700 OSes and versions and accomodating all of them is not an easy task.

Another site which deals with the history of Unix OSes is maintained by Patrick Mulvany which also contain a nice timeline of Unix OSes in a PDF format.

Tuesday 19 September 2006

A concise tutorial on using Git - the Source Code Management tool developed by Linus Torvalds

There was a time when Linux code was managed using the Free as in Freedom Beer tool called Bitkeeper - a Source Code Management tool developed by Larry McVoy. But due to the differences of opinion between the free software developers and Larry, Linus decided to develop his own free (as in freedom) revision control software which he named Git. For those who are curious, Jermey had written a detailed article about the politics of Bitkeeper vis-a-vis Linux when this broke out. Now the Linux kernel source is managed using the new tool developed by Linus called Git.

Eli M. Dow has written a good tutorial which explains the basic concepts behind the usage of Git to manage source code. He walks one through the installation of Git, using Git to obtain the latest Linux kernel source tree, checking, modifying, adding and removing files to committing the changes made.

There is a still lengthier documentation at kernel.org explaining all the configuration switches of Git which also makes an interesting read.

Monday 18 September 2006

Open Source as Prior Art - its Motto and RMS's Opinion on its mission

Open Source as Prior Art is a project conceived by a group consisting of USPTO (United States Patent and Trademark Office), Eclipse foundation, IBM, Novell, Open Source Development Labs (the sponsors of Linus Torvalds), Red Hat and OSTG (the owners of slashdot.org, sourceforge.net and other sites).

The motto of OSPA is to improve the quality of software patents by providing better accessibility to Open Source software and documentation that can be used as prior art during the patent examination process.

Prior art is a term used by patent offices around the world to signify all information that has been disclosed to the public in any form before a given date. When a person or group applies for a patent for their work, the patent office will first check whether a similar work has been already released as prior art and if it is not - then, and only then a patent is allowed.


Richard.M.Stallman - the father of GNU - has voiced his strong reservations about this project in an article he has written, and feels that this project could backfire and will significantly weaken the resistance towards software patents of which he is a staunch critic. GNU strongly opposes having any truck with the idea of software patents.

It is interesting to see RMS wade towards his goal of creating a software patents free society disregarding all opposition to his beliefs. In fact, one of the qualities that I find in him which is common in all leaders who have made a mark in society is persistence. He doesn't (allow others to) dilute his beliefs for which he stands for. And this is what has brought GNU where it is now - basking in the limelight of grateful free software users.

Sunday 17 September 2006

A visual walk through of a couple of the new features in Vim 7.0

A very prominent personality once said, and I quote :
"Sometimes, people ask me if it is a sin in the church of Emacs to use the editor Vi. It is true that Vi-Vi-Vi is the editor of the beast...."
Just for once, I wouldn't mind siding with the beast if that is what it takes to use Vi. The modern avatar of Vi is Vim - the free editor created by Bram Moolenaar. Riding from strength to strength, this editor in its 7th version is a powerhouse as far as an editor is concerned. When ever I use Vim (or GVim for that matter), it gives me the impression of the Beauty and the Beast. It is very beautiful to look at - if you are like me who finds beauty in software , and it is also as powerful as a beast. I use this editor exclusively for all my editing needs that, when I use any other editor, I inadvertently press escape key. That should give you an idea of how ingrained the use of this editor has become in my computing life.

Vim 7.0 - the latest version has a slew of new features built into it. Some of them which I am aware of are as follows:

On the fly spell checking
Vim 7.0 has an on the fly spell checker built into it similar in lines to that found in Microsoft Word. By default, this feature is turned off. But by navigating to Tools -> Spelling -> "Spell check on", you can make Vim display all the mis-spelled words in your document. It does this by highlighting them with red coloured wriggly lines. And all it takes to correct the misspelled words is to move the caret to the highlighted word and while in "Vi Command mode", press 'z=' and Vim will show a list of words closest in relation to the misspelled words and the user can choose from them.

Fig: On the fly spell checking

Suppose, you want GVim to recognise the word GVim as a valid word. It is possible to tell the spell checker that GVim is a good word by moving the cursor on the GVim word and pressing 'zg' in command mode. On a similar vein, it is possible to tell Vim spell checker that a word is wrong by pressing 'zw'. Vim stores the good/bad words that the user recognises in a file associated with the variable spellfile. If the file is empty or not created, then Vim will create one automatically and store the words in this file for future use.

Other spelling related commands
:set spell - Turns on the spell checking
:set nospell - Turns off the spell checking (can be achieved using GUI too).

:]s - Move to the next mis-spelled word in the document.
:[s - Same as above command but searches backwards.
z= - Shows a list of close matches to the mis-spelled word from which the user can pick the correct one.

Bracket highlighting
This feature is most useful for programmers than for ordinary users. Vim will automatically highlight the corresponding closing bracket when the caret is moved over any bracket. This helps in keeping track of the blocks of code and is especially useful when writing code which make use of multiple layers of brackets. Ofcourse this feature could take up some memory. But you can use the ':NoMatchParen' command to disable this feature.

Fig: Bracket highlighting

Omni completion
It is a smart kind of completion like the intellisense. It is most useful for people who write code. For example, if I am writing HTML code and I have saved the file with the extension .html, then Vim will automatically load the HTML tag file and when ever I want Vim to auto complete the HTML code, while in Insert mode, I press the key combination [Ctrl+x] [Ctrl+o] and Vim will smartly guess the correct keyword and insert it. If there is any ambiguity, then Vim will show the possible completions in a pop up window. This feature is presently available for 8 languages which include C, (X)HTML with CSS, JavaScript, PHP, Python, Ruby, SQL and XML. It is also possible to add custom omni completion scripts.

Fig: Omni completion - a boon to the programmer.

Open files in tabs
One of the most useful user interface is the tabs. Support for tabs in applications have been well received by the ordinary users that most web browsers and editors now support opening pages in tabs. Following this trend, Vim has also incorporated tab support in its latest version. And like all things related to Vim, it is entirely possible to open new files in tabs and manage tabs using the commands entered in the Vim Command mode.

Fig: Open files in tabs.

For example, while editing a file in Vim, I wish to open another file in a new tab. I can move to Command Mode and enter the command as follows:
:tabe /home/ravi/Desktop/myotherfile.txt
... and Vim will open the file "myotherfile.txt" in a new tab.

A few other tab manipulation commands are as follows:

:tabs - View a list of tabs that are open with the file names. Use the command ':tabs' and Vim will display a list of all the files in the tabs. The current window is shown by a ">" and a "+" is shown for any modifiable buffers.

:tabc - Close the current tab.

:tabnew - Open a new file for editing in a separate tab.

:tab split - Open the file in the current buffer in a new tab page.

:tabn - Switching to the next tab page.

:tabp - Switch to the previous tab page.

:tabr[ewind] - Go to the first tab page. You get the same effect when you use the :tabf[irst] command.

:tabo - Close all other tab pages.

Undo Branches
One of the things I really like about Vim is the use of the key 'u' to undo any changes. When ever I make a series of mistakes while editing a document, I just move to command mode in Vim and press the key 'u' a series of times to move to a point prior to the mistakes.

Fig: A list of undo levels with the time

In Vim 7.0, a new feature has been included which allows a user to jump back or forward to any point of editing. For example, I am editing a document and after a couple of minutes (say 10 min), I realise that I have made a mistake. I can easily take the document to a point 10 minutes back by using the command :
:earlier 10m
Or for that matter, move to a point 5 seconds ahead by using the command:
:later 5s
You can use the command :undolist to see a list of undo branches existing in the buffer. And each branch will have a number associated with it and it is possible to move to the undo level by using the command:
:undo <number>
Anybody who has used Photoshop will find that this feature is similar to the history levels you have in Photoshop, the only difference being that in Photoshop it is for images where as in Vim it is for text.

These are not the only new features. There are scores of others like Remote file explorer which allows one to directly edit a file residing in a remote location, better POSIX compatibility, Vim's own internal grep and so on which I have not covered here because this article is after all a visual walk through of the new features in Vim 7.0.

It takes real genius and stellar coding skills to create and maintain such a versatile editor and Bram Moolenaar has proved yet again that he has the necessary ingredients to qualify him for the post.

Thursday 14 September 2006

A concise guide to update-alternatives in Debian distributions

While running GNU/Linux, it is common to find different versions of the same software residing on your hard disk. This is especially true for programming language compilers. For example, Java for Linux comes in different forms. One is the open source version which is popularly known as the Blackdown java and the other is the official release from Sun Microsystems which is the original Java. Then there is the GCJ which is a GNU compiler for Java. Many times users have more than one version of Java installed and it becomes necessary to let the system know which Java executable is favoured by the user in order to avoid ambiguity in command execution. This is just one example. In fact it need not be just related to programming, it can also be related to say, mail transport agents - like suppose you have two mail transport agents sendmail and postfix installed on your machine and you want to easily choose one from the other as the default MTA.

GNU/Linux has built-in a good functionality to sort out this issue to the end users tastes. In an earlier post, I had covered in a concise way how it is accomplished in Red Hat and Fedora. Debian (based) distributions also have a similar tool in 'update-alternatives' which can be used to easily make a program the default one over any other similar programs.

Steven Kroon has writen a very good article which explains in detail by aid of examples, the usage of update-alternatives which makes a very informative read.

Wednesday 13 September 2006

Does an OS have to be costlier than the hardware on which it is run ?

Does an OS have to be as costly or even more than the hardware on which it runs? This seems to be the question that I am forced to ponder myself again and again. When I open the day's newspaper, I am besieged by ad after ad offering to sell PCs at bargain prices, some of them as low as $250. To list an example, I came across this newspaper ad offering the Dell Poweredge SC430 Server which features an Intel Pentium D Dual Core Processor 820 with 1GB DDR2 ECC SDRAM, a 250 GB SATA hard drive and an embedded Gigabit NIC for around $ 455 (US Dollars). Oh yeah, they also throw a 1 year onsite warranty and free lifetime telephonic support to boot.

Now when you consider this with the estimated price of the yet to be released Windows Vista (ranging from $199 to $399), one can't help but gawk at its price. Not to talk about Microsoft's future plans of recognizing the OS and Software it sells as a service rather than a product - in which case the end user is left with the further liability of shelling out money on a yearly basis for upgrades - something similar to paying mortgage for your home.

Why should the OS be priced at par or even more than the hardware on which it runs ? Shouldn't it be the other way round? For instance, lots of efforts and tangible materials go into the making of each computer. And this effort put into it proportionately increases as you manufacture/assemble larger quantity of computers. It doesn't decrease or remain the same by any count. Then there is the logistical nightmare of storing and delivering the finished product to the end users. Also when you sell a computer, you end up relinquishing control over the product in exchange for the money.

But when it comes to developing a software or OS for that matter, none of the above rules hold true precisely because an OS is intangible by nature. It is possible to distribute the OS to 10s, 1000s, millions or billions of people and still the creators of the OS will have the original OS with them. The logistical problems are a bare minimum for the simple reason that the OS can be distributed via electronic medium such as the Internet. And if they are providing boxed versions, it takes up much less floor space than computers.

Yes efforts and costs are involved in creating a robust OS. But once the main coding is done and finished, the further costs incurred by the OS company is mostly on marketing, bug fixing and in adding new features. For instance, of the reportedly 57,000 strong employees working at Microsoft world wide, a large percentage of them do jobs related to marketing.

This obvious mismatch in pricing of proprietary OSes is precisely one of the reasons that GPLed OSes are increasingly gaining favor among the computer users. The ideological factors apart, it doesn't cost an arm and a leg to acquire GNU/Linux even if you opt for one of the numerous GNU/Linux distributions which are sold for money. And the fast paced advances of the various projects developed to run on this OS (Gnome, KDE, Wordprocessors, Web Browsers, Graphic editors.....) make sure that the end user is not left wanting in his computing needs.

So the next time your hands start itching to buy the latest state of the art proprietary OS , ask yourselves this question. Is the mismatched price of the OS justified ? And what are the other avenues one has which gives more or less the same user experience without lightening your wallet by any measure?

Tuesday 12 September 2006

Developing websites solely in GNU/Linux - A Web Developer's Experience

Lets face it. Developing websites means using a mis-mash of software right from the ubiquitous text editor to full blown graphics editors, having access to a variety of web browsers and even good ftp clients to upload the files to the remote server. I have at times wondered what it is like to develop complete websites right from the designing stage to the final implementation all from within GNU/Linux. Considering that GNU/Linux and the applications that run on it have advanced considerably to be viable options for web development, I did believe that it was entirely possible.

J. Christopher - a web developer by profession has written a two part series listing his experiences in developing full blown websites entirely in GNU/Linux. In the first part, he gives an outline of why he chose GNU/Linux. He talks about using Gimp and Pixel to create mockups of the website as well as other software like Beagle which made a big difference in bringing convinence while developing websites. It felt nice to learn that his watcom tablet was detected without any problem in Linux (Ubuntu 6.06). Though he says that developing flash based sites would be a problem. In the second part of the series, he gives a run down of the different editors he uses and how he had access to Internet Explorer in Linux - (after all IE still is the dominant web browser in the world and is unavoidable while developing websites). Both the articles are peppered with links to useful web resources related to Linux.

The author after using Linux for a couple of months is absolutely pleased with the switch from Windows to Linux and considers himselves to work faster, smarter and happier since the switch.

Monday 11 September 2006

Book Review : Beginning Google Maps Applications with PHP and Ajax

Ask me what is one of the most useful feature on the net which will remain popular for times immemorial, come what may, and I will without an iota of doubt tell you that it is maps. That is right, maps were used in the bygone era to navigate from one place to another and maps are still relied upon in these modern times for charting out ones journeys. So it is no surprise that with the dawn of the Internet, the maps got transferred from the physical to the electronic medium. One of the most exciting projects which makes use of maps is the Google's Keyhole project now known commonly as Google Maps. What is unique about Google maps is that it mashes up satellite telemetric data with the maps and displays it in a web browser allowing a wide degree of user interaction. What is more, Google has released the Google maps API library to the public so that anybody can use it to create custom maps and display them online in a visually persuasive way.

A one of a kind book I have come across in recent times is the Google Maps Applications with PHP and Ajax from Novice to Professional co-authored by Michael Purvis, Jeffrey Sambells and Cameron Turner, published by APress.

This book is divided into 4 parts spanning 360 pages. The first part of this book deals with giving the readers an introduction to Google Maps. Here the authors explain in a clear manner what makes the Google Maps tick. In particular we get an idea about the special markup language used by Google Maps called the Keyhole markup language (KML). This part is divided into 4 chapters and each concept behind Google maps is explained using real life examples which makes the narration all the more interesting. For example, in the second chapter titled "Getting Started", the authors give a step-by-step example of creating a basic Google map and then using markers to tag the places in the map. Going through the example, I felt some understanding of JavaScript language is essential as Google maps makes extensive use of JavaScript to bring usability to the project. But the way in which the examples are interlinked with the explanation makes it all the more easier to follow.

In the third chapter titled "Interacting with the user and server", one gets to work on a simple example of creating a geocaching map and writing code to create an information window which allows an end user of the map to insert additional information and markers throughout the map. This example also introduces the user to the Google Ajax Object which plays an important part in saving and retrieving data from the server.

Geocoding is the process of converting the land addresses to the precise latitude and longitude of Earth. The fourth chapter titled "Geocoding Addresses" takes an indepth look in this area.

What I really like about this book is instead of jumping into a theoretical discourse, the reader is actually made to work on an example which highlights the concept being covered, which in-turn imparts value to the narration.

The second part titled "Beyond the Basics" contains 4 chapters and each of them explains how to improve various aspects of the map. In particular, chapter 5 deals with an example of using the relevant data in the US Federal Communication Commission Antenna Structure Registration database to incorporate it in the map that is being build. Here one is introduced to coding using PHP to retrieve the relevant data from the database. In fact this particular example spans the next two chapters to provide the readers a start to finish project of building a map and then beautifying it.

Chapter 6 titled "Improving the user interface" jumps into using CSS and javascript to make the user experience as pleasant as possible. Such tricks as creating collapsible side panels and then populating the panels with data is dealt with here.

But what does one do when the data that is to be mapped is really huge ? It is not possible / feasible to map all the data using separate objects for each individual entity. Doing so will most probably bring the web browser which is used to render the map to a halt. So it is imperative that when dealing with large amounts of data which runs to tens and thousands of points on the map, alternate methods have to be pursued. The seventh chapter titled "Optimizing and Scaling for Large Data Sets" presents a variety of methods for working with large data sets without bringing the web browser to a halt.

The next part of the book titled "Advanced Map Features and Methods" contain 3 chapters, the first of which titled "Advanced Tips and Tricks" contains over 6 tips/tweaks from creating a custom info window to creating custom controls and more.

The next two chapters in the third part of the book takes a mathematical bent and deals with such concepts as computing the area and perimeter of an arbitrary region or calculating the angles on the earth's surface, pursuing geo-coding concept in depth and so on.

Finally, there are two very useful appendices, one of which lists additional online resources which one can use to learn more about this very interesting topic.The other appendix lists the entire Google Maps API.

Book Specification
Name : Beginning Google Maps Applications with PHP and Ajax from Novice to Professional
ISBN No: 1-59059-707-9
Authors : Michael Purvis, Jeffrey Sambells & Cameron Turner
Publisher : APress
Price : Check at Amazon.com Store
No of Pages : 360
Rating : Very Good

End Note
It is not everyday that one encounters a book which explains such a specialized but very useful subject as creating online maps. I found it a really indepth book covering all the concepts related to implementing Google Maps at the same time with all the stress given to a practical approach. Going through the book, I felt the authors have really done their homework in the art of creating user interactive online maps using Google Maps API.

Sunday 10 September 2006

MythTV - Record and playback all your favourite TV soaps in GNU/Linux

I was looking forward to seeing this wonderful movie which was slated to be aired on TV a couple of weeks back and I had made sure I finished all my chores in time so that I could watch the movie with respite. But then as bad luck would have it, just when the movie started and I settled down to enjoy it, a couple of friends dropped by for a surprise visit. And that blew away any hope of watching the movie. At times like these, I have often wondered about means by which I could record the movie during the time it is aired and then watch it later when I am free.

In days of yore, I remember, people used to record the TV programs using a VCR (Video Cassette Recorder) which held at-most 2.5 hours of video. And the result was not guaranteed to be crystal clear. You had to take your chances.

Then the computer revolution took place. Now a days, it is possible to watch TV programs on your computer and all it takes is a TV tuner card which you insert into your computer's PCI slot. And some TV tuner cards come with its own remote which makes it as easy to switch channels as in a TV. Of course with the aid of requisite software it is possible to record the programming real time and store them on the hard disk. Microsoft has released a version of Windows called "Windows Media Center Edition" which allows a PC with a TV tuner card to record and playback TV programs.

Another very popular device is the "Tivo" service which apart from the above mentioned features also sport additional ones such as accessing internet radio, podcasts, sharing digital photos and more.

MythTV is a PVR (Personal Video Recorder) project consisting of a collection of GPL licenced programs which aims to bring the same functionality as provided by Tivo. Some of the features of MythTV are as follows:
  • Basic TV functionality which includes Pause,Fast forward, Rewind live TV.
  • Support for multiple tuner cards and multiple simultaneous recordings.
  • Distributed architecture allowing multiple recording machines and multiple playback machines on the same network, completely transparent to the user.
  • Compress videos using a variety of formats including mpeg4.
  • Automatically detects commercials and skips them. A boon to save disk space when recording movies aired on TV.
  • Grabs program information using xmltv.
  • A fully themeable menu to tie it all together.
  • Picture in picture support, if you have more than one tuner card.
  • Electronic Program Guide that lets you change channels and select programs to record.
  • Program Finder to quickly and easily find the shows you want to record.
  • Browse and resolve recording conflicts.
  • Rip, categorize, play, and visualize MP3/Ogg/FLAC/CD Audio files.
MythTV also include additional modules which extend its functionality to include additional features such as :
  • An emulator front-end for playing games (if you have access to ROMs)
  • A picture viewer
  • A DVD player / ripper
  • An RSS news reader ... and much more.
But the one thing which needs to be highlighted is that MythTV software runs on GNU/Linux and Mac OSX and supports both powerPC and Intel architecture.

MythTV being a hackers project, it is beyond a lay person's means to set it up on his computer running Linux. And as with the laws of demand and supply, various projects have cropped up revolving around the MythTV project which aims to make it easier to install and setup MythTV for even people with limited technical knowledge. Some of them which I found interesting are as follows :

KnoppMyth : This is an attempt at making the Linux and MythTV installation as trivial as possible. This is a Linux distribution built from scratch using Debian GNU/Linux and the programs from Knoppix. KnoppMyth includes MythTV and all its official plugins as well as additional software such as Apache webserver, NFS, Samba and many other useful daemons. This GNU/Linux distribution is geared at setting up a PVR (Personal Video Recorder) in a quick and easy manner.Everything one needs to easily setup a power home entertainment system is included in this distribution.

MythTV for XBox - This is a project which aids in setting up MythTV on ones XBox gaming station with ease. Of course it is understood that you need to install GNU/Linux on XBox first as MythTV runs in Linux. This project requires that you first download and install a version of GNU/Linux called Xebian in your XBox.

MiniMyth - This is a small Linux distribution which turns a diskless computer into a MythTV front-end.

Fedora Myth(TV)ology - This is a project started by Jarod Wilson - an RHCE himself and currently working for Red Hat, this is his endeavour to make running MythTV as seamless and easy as possible in Red Hat based Linux distributions. This site has lots of information about the types of TV related hardware supported by Fedora as well as numerous tips, tricks and solutions which he stumbled upon while trying to install and configure MythTV on his Fedora Linux machine.

Ed Tittel and Justin Korelc have written a very good article which gives more details about MythTV which makes an interesting read.

Having dwelled so much on MythTV project, I might also add that there are two similar projects (though not as feature rich) which are taking shape to provide PVR functionality in GNU/Linux. They are Freevo and GeexBox.

Friday 8 September 2006

Is Ubuntu and Debian on ideological cross roads ? - Mark Shuttleworth clarifies

A couple of weeks ago, one of Debian's most active developer Matthew Garrett threw down the towel and called it quits protesting against the Debian's rather strong democratic culture of having a free for all discussion about any decision making pertaining to Debian making him intensely irritable and unhappy. He went on to compare Debian's lack of civility and slowness in decision-making with the more structured way in which decisions are taken at Ubuntu.

On the backdrop of Matthew's exit from Debian, Mark Shuttleworth himself has chosen to respond to and clarify Ubuntu's position in relation with Debian on his blog.

And his opinion is that Ubuntu (and many other Linux distributions based on Debian) can never survive without Debian.

He goes on to state that Debian's chief strengths is its uncompromising emphasis on free software. He dwells on some of the short comings of the way Debian is managed and believes that at the end of the day, some introspection is healthy and that Debian will benefit from the discussion.

Thursday 7 September 2006

Access a remote Linux Desktop using FreeNX

NX short form for NoMachine's X protocol is a compression technology developed by NoMachine which allows one to run complete remote desktop sessions (be it Linux or Windows) even at dial up internet connection speeds. One of the advantages of using NX technology over VNC is that NX uses SSH on port 22 for connection between the client and the server. Which means all the communication takes place encrypted through industry standard SSL public key cryptography.

FreeNX is the GPL implementation of NoMachine's NX server. To have access to a remote desktop, you need to have two software.
  1. The (Free)NX server installed and running on the remote machine and
  2. The (Free)NX client installed on the local machine from which you want to have access to the remote machine.
I tried this technology by connecting via dialup to a demo remote server run by NoMachine and I was really impressed by the speed with which I recieved the remote KDE desktop. Infact, the NoMachine demo server called TestDrive provides three choices of Gnome, KDE and a Windows desktop (through RDP / terminal server).

NX clients are available for Debian/Ubuntu in deb format, RPM for Red Hat based distros and gzipped tar file for all other Linux flavours. Why just for Linux, NX clients are available for Windows, Solaris, Mac OSX and even Sharp Zaurus and HP/Compaq iPaq (PDAs). So it is possible to access the remote Linux/Solaris desktop from all these machines.

The primary difference between NX technology and VNC is that, VNC works by grabing screenshots of the remote desktop which means the network traffic is rather heavy. Where as NX uses its in-house developed X compression technology to display the remote desktop on the local machine. Security wise too, NX scores over VNC.

Daniel.W.Amstrong has written a very nice article explaining how to install and configure a FreeNX server and client in Linux. He has used Kanotix as the test machine but I believe the steps are the same for any other Debian based distribution.

Monday 4 September 2006

Optimal use of fonts in GNU/Linux

Ask any person who has used a computer atleast once and he will agree that fonts form a very important part of the operating system which is installed in the computer. At one time, GNU/Linux lacked good font support and any webpage viewed in a web browser was at the most lackluster.

Things changed somewhat with the release of good set of fonts for GNU/Linux called Bitstream. But even now the Linux counterparts (Mac OSX and Windows) enjoy a slight edge as far as good fonts are concerned. One look on the web will throw up lots of fonts and each of them can be installed in Linux but they lack in one aspect or the other and it costs a bundle to buy a good set of fonts. So the big question is - how do you enhance your Linux experience ? And is it possible to do so with the default set of fonts that are bundled with Linux?

Avi Alkalay, Donovan Rebbechi and Hal Burgiss together has written an enlightening article which explains all the facets related to fonts and how one can optimally use fonts in Linux which makes an informative read. I found the article exhaustive in its handling of this subject and contain such unique information as different types of fonts, steps for migrating a set of fonts from one system to another, the font technologies such as true type, bitmap fonts and so on, different places from where one can source good fonts for use in Linux and finally a collection of font software for Linux. The article is replete with screenshots and is a must read for any Linux enthusiast who is interested in further enhancing the user experience in Linux.

Friday 1 September 2006

Book Review: Drupal - Creating Blogs, Forums, Portals, and Community Websites

I am sure anyone who has anything to do with computers have heard of a system administrator. But not many would be aware of a content management administrator or more specifically a Drupal administrator. Drupal is a very popular open source content management system which is used by 10's and 1000's of individuals and firms alike to host professional websites which integrate blogs, forums, portals and so on. Considering the sheer number of uses that Drupal can be put use to, it is not surprising that one needs to be aware about the innumerable configuration parameters which are made available to the person in charge of administering the site. This is especially true if you want your site running on Drupal to work in a specific manner.

I found the book titled "Drupal - Creating blogs, forums, portals and community websites", authored by David Mercer and brought out by Packt Publishers to be a good introductory book which aims to walk the uninitiated person in setting up Drupal and making it work for him.

The book is divided into 10 chapters spanning 300 pages.

The first chapter gives a thorough introduction to Drupal, what it is, in what ways it could be put to use and so on. Here the author introduces the reader to the Drupal community and how the community has grown over time to provide help to people on all things related to Drupal.

The second chapter titled "Setting up the development environment" explains how to setup Drupal on ones machine which includes the pre-requisites like creating the database as well as obtaining and installing Drupal. How to upgrade Drupal from one version to the next as well as common troubleshooting problems are also dealt with in this chapter, which existing Drupal users will find useful. One grouse I have about this book is that the narration is totally windows centric when most web servers run on one or another form of Linux/Unix OS. And it would have been nice if the author had included a section in configuring the database on Linux/Unix even if it was as an afterthought. But having said that, this chapter gives all the details that needs to be known in installing Drupal.

The next two chapters deal with the site configuration aspects. Here the author walks one through each and every aspect of configuring, more specifically the general configuration parameters. The steps are well illustrated with pictures which make the whole process easy to follow.

Drupal has by default two inbuilt roles - that of anonymous user and authenticated user. And each role has separate powers associated with it. The beauty of Drupal is that it is possible to create ones own roles and add users to it. The fifth chapter titled "Users Roles and permissions" explain this concept in detail. Here one gets to know how to plan for and implement roles in Drupal and also the permissions that need to be allocated to the individual roles.

The sixth chapter titled "Basic Content" gives a broad outline of the various content types such as blogs, books, forum topics and so on. In fact, Drupal has over 10 different content types. This chapter also explain how to edit and configure this content. The author has done a pretty good job of explaining the various options that are available to the administrator which will help him to manage the content added to the site. This chapter also has a section which introduces two popular modules called aggregator and taxonomy module and how they can be integrated with the website to bring additional flexibility and variety to the content.

Taxonomy is a very useful module which provides the power and flexibility of tagging ones articles using categories in Drupal. In the seventh chapter titled "Advanced content" the author gives a detailed explanation of the concept of taxonomy and the different terminology used. This chapter also illustrates how to categorize content and discusses its pros and cons. It also has a run down of the most common HTML tags that can be used and their usage which will be helpful for people who are new to HTML coding.

In the next chapter, the author tries to tie all the loose threads together and walks the reader through getting more acquainted with the Drupal interface. Here one gets to know about customizing the themes by modifying the CSS file, inserting a custom logo on the site and so on.

Drupal has innumerable modules and it is not practical in covering all the modules in a book. But still, in the 9th chapter, the author covers how to configure two very useful modules called flexinode and adsense. I especially found the explanation of AdSense module really interesting, what with most people nowadays running adsense to monetize their websites. This chapter also has a nice example which explains how to incorporate dynamic content using Ajax which I found really interesting.

In the last chapter titled "Running your Website" of this book, the author tackles miscellaneous topics such as taking backup of the Drupal database, using cron to schedule tasks and so on. There is also a table listing the tips for optimizing ones website for getting indexed by the search engines which I found really informative.

Book Specification
Name : Drupal - Creating Blogs, Forums, Portals, and Community Sites
ISBN No : 1-904811-80-9
Author : David Mercer
No of Pages : 270
Publisher : Packt Publishing
Price : Check at Amazon.com or at Packt Publishing.
Rating : Very Good

This is a book which is clearly targeted at the beginner who is aspiring to set up a website based on Drupal. The beauty of Drupal is that it allows common folks to publish and manage content online without much knowledge of programming. But to come up to date with administering Drupal, one has to overcome a slight learning curve and be conversant with the new terminology it introduces. I found this book to be a good guide for setting up and configuring Drupal. The author also provides various online resources where the reader of the book can find further information regarding Drupal.

Howto, Tutorials and Faq related to Linux, BSD, Solaris - Part 1

These are some of the interesting articles you will find in this blog related to Linux.

System and Network administration

Tips and tricks


Apache web server
Set up an Apache web server cluster in 5 easy steps

BSD related articles
A collection of tips for people new to BSD