Sunday, 28 January 2007

Install Debian from within Windows

That is right, Debian has got itself a new Win32 installer. This new software is targeted at people who are not too tech savvy to know the steps needed to burn the Debian ISOs on to a CD/DVD. The first time I read the news, I wondered how it was any different from installing Linux on a UMSDOS filesystem ? It is very different it seems...

The setup consists of a Debian installer loader which merely downloads a Debian netboot installer - you can choose between a GUI install and a text based install. And in the next reboot of the computer, Grub loads and prompts you to either boot into Windows or initiate the Debian installation. This is made possible by utilizing the services of Grub4DOS which is a GRand Unified Bootloader which uses the grub console GDLR which can be loaded from within the Windows boot manager.

Once the Debian installer starts, the rest of the steps are the same as those you would carry out in a normal installation of Debian. So you have the option of repartitioning your hard disk from within the installer and dual boot between Debian and Windows or entirely wiping out your Windows OS to make way for Debian.

The Debian installer loader can be downloaded from the goodbye-microsoft.com website. A couple of screenshots of the installer have also been made available here.

Saturday, 27 January 2007

How to use Tabs in Vim Text Editor

Vim
Vim is a very powerful text editor created by Bram Moolenaar. Vim is so versatile that it can even be used as a plug-in in Microsoft Visual Studio.

If you are interested in learning how to use Vim editor, then check out the following resources :Read more »

Friday, 26 January 2007

Free Book - Linux Kernel in a Nutshell

One of the advantages of using GPLed software is that anybody who wish to use or modify the code can do so without fear of any repercussions. Ditto for the documentation of the software. This has at times tempted many a book author to release their books under a liberal license and make their efforts available for free in an electronic format.

One such author is Greg Kroab-Hartman who has released his book titled "Linux Kernel in a Nutshell" under the Creative Commons Attribution-ShareAlike 2.5 license which allows you to download and redistribute the book.

This book is not new rather, it has been significantly revamped to include details of the 2.6.18 Linux kernel.

This book covers the entire range of kernel tasks, starting with downloading the source and making sure that the kernel is in sync with the versions of the tools you need. In addition to configuration and installation steps, the book offers reference material and discussions of related topics such as control of kernel options at runtime.

The author claims this book is targeted at the lay person who wish to delve deep into understanding the Linux kernel and apart from a basic familiarity of the Linux shell commands, no particular prerequisites are expected from the reader. So it is a how-to sort of book which explains the steps that lead to properly building, customizing , and installing the Linux kernel.

So why should you recompile a Linux kernel ?
There are many advantages to compiling a Linux kernel. For one, you need enable only those modules which are required by your machine. For example, if your machine does not have support for infra red or do not have a need for PCMCIA, then you can disable those features in the kernel configuration and build your custom kernel. This will make the kernel lean and speed up the boot process. Similarly, If you intend to run Linux on a 486 machine (Yes it is entirely possible), you can turn off all the other processor specific support in the kernel configuration file and build a kernel targeted specifically at your processor.

So if you are the curious one who wish to learn how to configure, compile and install your own Linux custom made kernel then this book will be very useful.

Table of contents of "Linux Kernel in a Nutshell"
  • Title page
  • Copyright and credits
  • Preface
  • Part I: Building the Kernel
    • Chapter 1: Introduction
    • Chapter 2: Requirements for Building and Using the Kernel
    • Chapter 3: Retrieving the Kernel Source
    • Chapter 4: Configuring and Building
    • Chapter 5: Installing and Booting from a Kernel
    • Chapter 6: Upgrading a Kernel
  • Part II: Major Customizations
    • Chapter 7: Customizing a Kernel
    • Chapter 8: Kernel Configuration Recipes
  • Part III: Kernel Reference
    • Chapter 9: Kernel Boot Command-Line Parameter Reference
    • Chapter 10: Kernel Build Command-Line Reference
    • Chapter 11: Kernel Configuration Option Reference
  • Part IV: Additional Information
    • Appendix A: Helpful Utilities
    • Appendix B: Bibliography
    • Index
All the chapters have been made available as individual PDF files and can be downloaded from the author's website. This book is published by O'Reilly and if need be, you can also buy a printed version of the book. It is a very nice book which teaches the art of configuring, building and installing your very own custom Linux kernel.

Tuesday, 23 January 2007

CNR for all - An easy way of installing software on any Linux distribution with just a few clicks

Linspire is synonymous with the popular CNR ("Click 'N Run") software where you download a package of your choice from the Linspire CNR store and install it just like you do in Windows - that is by double clicking on it. The CNR warehouse has a collection of over 20,000 Linux packages, libraries and products, some of them commercial products like Win4Lin Pro, CodeWeavers' CrossoverOffice and TransGaming's Cedega which are made available to the Linspire / Freespire users. And the users can search for applications by title, popularity, user rating, category, function, or author.

Till now CNR contained software primarily for Linspire or Freespire Linux distribution users. But Kevin Carmony - the President and CEO of Linspire Inc who operates the CNR repository has now made public, his intension of supporting all other Linux distributions via its CNR one click install software.

Just to bring it in perspective, consider this scenario... At present, if you are a Slackware Linux user and you want to install say, GNUCash - a financial software, there is no easy way of installing it other than downloading and compiling the source of GNUCash and all its library dependencies. This is because the Slackware distribution does not support Gnome or GTK2 based software and so the official Slackware repository does not offer a compiled version of GNUCash.

With CNR supporting all Linux distributions, it will be possible to download the GNUCash binary from the CNR website and install and run it on Slackware with just a couple of clicks. It will be easy to upgrade any software to the latest version with ease. Finally, we will have a process of installing software using the CNR installer, just like you do it in Windows, that too for any Linux distribution.

Fig: The CNR warehouse with the software packages divided into categories

Kevin Carmony claims CNR does dozens of things to make finding, installing and managing software on your desktop computer extremely easy. For example, it is very easy to find the right piece of software with user reviews, charts, screenshots, descriptions, friendly names, and so on. Once you've found what you're looking for; with literally one click, the software is installed to your computer and icons added to your desktop and Launch Menu. CNR then notifies you when updates are available, which you can then install with one click. With this anouncement, CNR now has a new website at CNR for all.

Sunday, 21 January 2007

Book Review: SELinux by Example

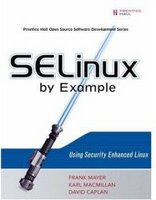
SELinux by ExampleSELinux is a project started and actively being maintained by the U.S Department of Defense to provide a Mandatory Access Controls mechanism in Linux. It had been a long standing grouse of Linux power users and system administrators over its lack of fine grained access control over various running processes as well as files in Linux. While Solaris touts its famous RBAC and Microsoft Windows has its own way of providing finer rights to its resources, Linux had to put up with the simple but crude user rights known in tech speak as discretionary access control to control user access of files. But with SELinux project making great strides and now being bundled with many major Linux distributions, it is possible to effectively lock down a Linux system through judicious use of SELinux policies. SELinux implements a more flexible form of MAC called type enforcement and an optional form of multilevel security.

The book "SELinux by Example" is authored by three people - Frank Mayer, Karl Macmillan and David Caplan and is published by Prentice Hall. The target audience for this book is SELinux policy writers and system administrators with more content dedicated to be put to use by policy writers. There are a total of 14 chapters and 4 appendices spread just over 400 pages. The 14 chapters are in turn broadly divided into three parts with the first part containing chapters which provide an overview of SELinux, its background and the concepts behind it. The second part contain 7 chapters which are most useful for SELinux policy writers and contain detailed explanation of the syntax used in writing the policy files. It is the third part namely "Creating and Writing SELinux Security Policies" which could be most put to use by system administrators where the authors provide enough details of working with SELinux.

In the second chapter, the authors introduce the concept of type enforcement access control, understanding of which is imperative to ones knowledge of SELinux. They further talk on the concept of roles and multi level security. And true to the title of the book, all these concepts are explained by analyzing the security controls of the ubiquitous passwd program.

In the succeeding chapter the authors explain the underlying architecture of SELinux. More specifically, how SELinux integrates with the Linux kernel via the Linux security module (LSM), the organization of the policy source file and how to build and install policies.

SELinux policies to a large extent are based on object classes. For example, you can create an object class and associate a set of permissions to that class. And all objects associated with that class will share the same set of permissions. In the fourth chapter, one get to know about different types of object classes and the permissions that can be assigned to these classes. A total of 40 classes and 48 permissions are discussed in this chapter.

The next chapter titled "Types Enforcement" goes into a detailed analysis of all the types and attributes as well as the rules that could be used. The majority of SELinux policy is a set of statements and rules that collectively define the type enforcement policy. Going through the chapter, I was able to get a fair idea of the syntax used in writing TE policies.

Keeping in mind the complexity of the subject, it helps a great deal that at the end of each chapter, there is a summary section where the authors have listed the important points covered in the chapter. More over, one gets to answer a couple of questions and check one's knowledge about the topic being discussed.

In the 6th chapter, the authors explain in detail the concept of roles and their relationship in SELinux. In fact, what I really like about this book is the fact that each concept of SELinux has been dedicated a chapter of its own. For instance, constraints, multilevel security, type enforcement, conditional policies,... all are explained in chapters of their own.

One thing worth noting is that Fedora Core 4 and RHEL 4 and above ship with the targeted policy by default. Where as to completely lock down a Linux machine, you need to embrace the strict SELinux policy. But this has the side effect of causing breakages with some of the existing Linux applications which expect looser security controls. In targeted policy, the more confining rules are focused on a subset of likely to be attacked network applications. So in most cases, one can manage by using targeted policy. This book mostly deals with the strict policy of SELinux and in chapter 11, the authors dissect the strict example policy maintained and updated via the NSA and Fedora Core mailing lists.

But there is another policy called the Reference Policy which is an attempt to water down the strict policy maintained by NSA and in the process make it easier to use, understand, maintain, also to make it more modular and this is covered in the succeeding chapter titled "Reference Policy".

The chapter titled "Managing an SELinux system" is one which the system administrators will relate to, where the authors throw light on the hierarchy of SELinux configuration files. The purpose of each file is explained in simple terms. And considering that SELinux comes bundled with a rich set of tools meant to be used by system administrators, one gets to know the usage of some of them and also learn about the common problems that are faced by administrators while administering an SELinux system.

And in the last chapter of the book which is the 14th chapter, one is introduced to the task of writing policy modules. Here the authors hand hold in the creation of a policy module for the IRC daemon for Fedora Core 4 from start to finish which involves right from the planning stage to writing and applying the policy module, to the final testing of the module.

This book also includes 4 appendices which contain a wealth of knowledge on SELinux. I especially liked appendix C which lists all the object classes and permissions as well as appendix D which has a list of SELinux system tools and third party utilities with explanations.

It could be just me but I found that I was better able to assimilate what the authors explained when I read the 13th chapter of this book first and then went back to read the 4rd chapter onwards. Having said that, I find this book to be an excellent resource for people interested in developing SELinux policies and to a lesser extent a resource for system administrators. At the very least, this book imparts a deep understanding of the features, structure and working of SELinux.

Book Specifications
Name : SELinux by Example
ISBN No : 0-13-196369-4
Authors : Frank Mayer, Karl Macmillan and David Caplan
Number of Pages : 430
Publisher : Prentice Hall
Price : Check the latest price at Amazon.com
Rating : A very informative resource ideal for SELinux policy writers, Linux/Unix integrators and to a lesser extent to System Administrators.

Thursday, 18 January 2007

OpenSolaris installation screencasts

Today, I came across a very good collection of screencasts which visually walks one through the backing up, repartitioning and then installation of Open Solaris on ones laptop. The OpenSolaris release is 5.11 and all the installation steps are shown. You need Flash player ver 6 or greater to watch the screencast - not a big issue as Adobe has released Flash player ver 9 for Linux. In a nutshell, these are the steps that are showcased in the screencast.
  1. Backup your laptop to prevent any data loss, should something go wrong. The laptop has Windows XP professional pre-installed. So first the disk is defragmented and scan disk utility is run to make sure there are no errors. To do the actual backup, they use the free G4U - short for Ghost for Unix, which is similar to the Norton Ghost disk cloning software in Windows. This can be downloaded into three floppys or as an ISO and burned onto a CD. Using G4U, they perform a backup of the whole disk to a remote ftp server. G4U can also be used to do a disk to disk backup.
  2. The second step in the procedure is to repartition the disk to make room for OpenSolaris. For this they demonstrate how to shrink the Windows partition using the Free software QtParted. This is a GUI front end for the 'parted' tool and is similar to Partition Magic in that it non-destructively shrinks the partition. This software is available on the System Rescue CD which is a remastered Gentoo Linux distribution. One thing worth noting is that while creating the new partition, they format the new partition as Linux swap.
  3. Install Solaris on the newly created partition. This screencast shows all the steps in the installation of OpenSolaris albeit in a time compressed sequence.
  4. And finally, another screencast shows how to download and install Sun Studio 11 software on OpenSolaris.
All in all, there are 5 screencasts which I found to be truly informative. If you have the time and the bandwidth, watching the screencasts is highly recommended. More over, they may not be around for a long time as the domain doesn't work properly except the link containing the screencasts.

Tuesday, 16 January 2007

traceroute - a very useful troubleshooting tool which reveals the bottlenecks on the Internet.

I am sure anyone who is at the least Internet savvy, will be aware that to move data from one point say A to another point B across the Internet, it has to pass through a number of intermediary points say C, D,E.... But what many won't know is that your data is not transferred in one piece when it is sent over the net, rather, it is split into chunks of say 1500 bytes each, then each chunk is enclosed in what is known as a packet which contain some additional data such as the destination IP address and port number apart from some other details which provide the unique identity to the packet and finally it is sent across the net.

While the packets travel the path from point A to point B, each packet may take a different path depending upon diverse factors and eventually they are merged together in the same order at the receiving end to provide the document you sent in the first place.

The intermediate gateways through which the packets pass through before they reach the final destination are known as hops. So for data to travel from point A to point B on the net, it has to go through a number of hops.

Linux & Unix being network operating systems have a number of powerful tools which aid the network administrator to find out a wealth of data about their network and the Internet. One such tool is the ubiquitous traceroute.

The tool traceroute is available in all Unix and Linux distributions and is used to find out the potential bottlenecks in between your computer and a remote computer across the net. The usage of this tool is quite simple and is as follows:
# traceroute <domain or IP address>
Usually you have to be root to run this tool as it resides in the /usr/sbin directory. But if you use the full path, then you can run this tool as a normal user as follows:
$ /usr/sbin/traceroute <domain or IP address>

For example, this is the output I received when I ran a trace on the www.yahoo.com domain from my machine.
$/usr/sbin/traceroute www.yahoo.com

traceroute to www.yahoo.com (69.147.114.210), 30 hops max, 40 byte packets
1 10.2.71.1 (10.2.71.1) 21.965 ms 22.035 ms 22.111 ms
2 (ISP) (ISP gateway) 22.510 ms 25.716 ms 26.073 ms
3 61.246.224.209 (61.246.224.209) 69.212 ms 59.778 ms 63.334 ms
4 59.145.6.1 (59.145.6.1) 65.632 ms 64.750 ms 64.868 ms
5 59.145.11.69 (59.145.11.69) 63.562 ms 64.219 ms 63.742 ms
6 203.208.143.241 (203.208.143.241) 318.632 ms 307.733 ms 316.650 ms
7 203.208.149.25 (203.208.149.25) 317.534 ms 308.116 ms 307.507 ms
8 203.208.186.10 (203.208.186.10) 245.835 ms 247.878 ms 248.862 ms
9 so-1-1-0.pat1.dce.yahoo.com (216.115.101.129) 286.774 ms 289.702 ms so-1-1-0.pat2.dce.yahoo.com (216.115.101.131) 326.470 ms
10 ge-2-1-0-p141.msr1.re1.yahoo.com (216.115.108.19) 324.044 ms 324.497 ms 326.011 ms
11 ge-1-32.bas-a1.re3.yahoo.com (66.196.112.35) 333.479 ms 333.019 ms ge-1-41.bas-a2.re3.yahoo.com (66.196.112.201) 292.967 ms
12 * * *
13 * * *
14 * * *
15 * * *
.
. //Truncated for brevity
.
29 * * *
30 * * *
As you can see from the output spewed by traceroute, it defaults to a maximum of 30 hops. The first line of the output gives the IP address of the yahoo.com domain which is 69.147.114.210, the maximum number of hops traceroute will keep track of the packets before it reaches the destination and the size of the packets which is 40 bytes.

The next 30 or so lines show the IP address or domain name of the gateway servers through which the packets pass through as well as the time in milli-seconds of the ICMP TIME_EXCEEDED response from each gateway along the path to the host. traceroute program utilizes the IP protocol's time to live (TTL) field. By default, it starts with a TTL value of 1 but this value can be changed with the -f option.

Now lets take a closer look at the output of traceroute to the yahoo.com domain as shown in the listing above. As you can see, the second hop is always to ones ISP's gateway as shown by the address (I have removed the address of my ISP's gateway). On the same line, followed by the IP address, there are three time values in milli seconds. There are three values because traceroute by default sends simultaneously, 3 packets of 40 bytes each. And the three time values are the time taken to send the packets and receive a ICMP TIME_EXCEEDED response from the gateway. Put another way, these three values are the round trip times of the packets. So for the three packets to reach my ISP's gateway, and get an echo back, it takes 22.510 milli seconds, 25.716 ms and 26.073 ms respectively as is displayed by the values of the 2nd hop.

Lets look at the 5th and 6th hop in the output above. If you compare the times, you will find a drastic increase in the times. If it is 63.562 ms for the 5th hop, it is 318.632 ms for the 6th hop. This is because up till the fifth hop, the gateway servers were within the Indian sub-continent itself. Where as the gateway of the 6th hop is in Singapore and so it takes that much more time to get a reply. Generally, smaller numbers mean better connections.

Check out the 11th hop. It shows two domains with one domain for the first two packets and a different domain for the third packet.

And from 12th hop onwards I get a series of time outs as shown by the asterisks. So my trace of the www.yahoo.com domain resulted in a series of time outs and did not complete. The problems could be one of the following:
  • The network connection between the server on the 11th hop and that on 12th hop is broken.
  • The server on the 12th hop is down.
  • Or there is some problem with the way in which the server on the 12th hop has been setup.
To make sure, I did a ping of the www.yahoo.com domain and as expected, I received 100% packet loss as shown by the ping output below.
$ ping -c 2 www.yahoo.com
PING www.yahoo-ht2.akadns.net (69.147.114.210) 56(84) bytes of data.

--- www.yahoo-ht2.akadns.net ping statistics ---
2 packets transmitted, 0 received, 100% packet loss, time 1009ms
Usually this means I will not be able to access the concerned domain. But in yahoo.com's case, I was able to access the domain without any problem as in all probability, their website is mirrored across a number of servers spread across the world. So if one server is down, the query is re-routed to the next nearest server.

traceroute is a very useful tool to pin-point where the error occurs on the internet. It can also be used to test the responsiveness of a domain or server. For example, If your route to a server is very long (takes over 25 hops), performance is going to suffer. A long route can be due to less-than-optimal configuration within some network along the way.

Similarly, if you see in a trace output, a large jump in latency (delay) from one hop to the next, that could indicate a problem. It could be a saturated (overused) network link; a slow network link; an overloaded router; or some other problem at that hop. It can also indicate a long hop, such as a cross-country link or one that crosses an ocean (compare the timing of the 5th and 6th hop in the yahoo.com trace output above).